How do I set up User’s permissions in FastNet Business?
- Log into FastNet Business
- Click on the ‘Administration’ tab in the top level menu
- Click on ‘User Profiles’ from the left hand menu (this will show the full list of users for a site)

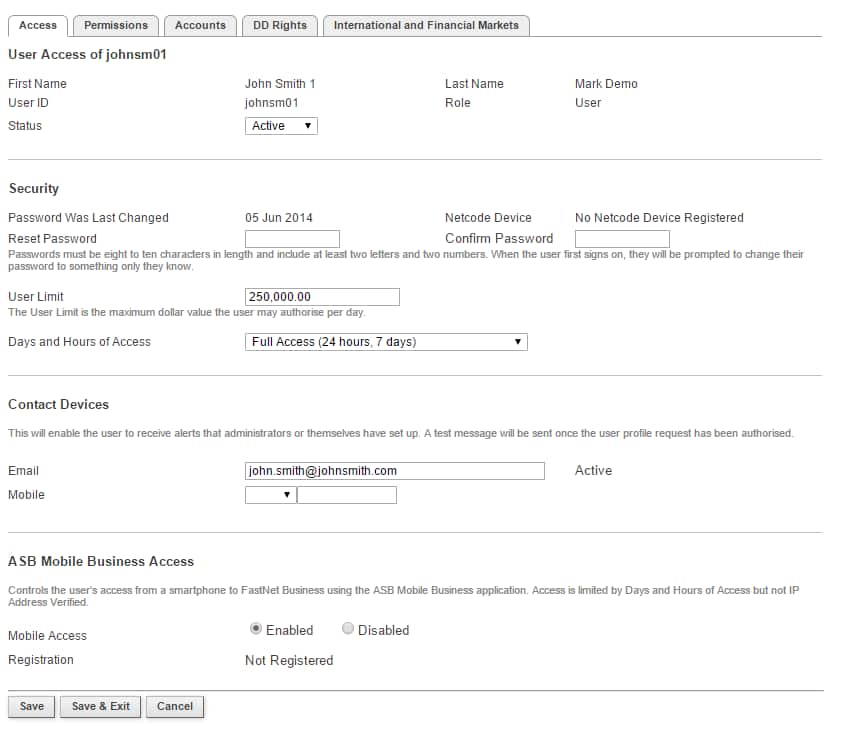
4. Click on the blue hyperlinked User ID for the person you wish to give permissions to. You will be taken to that individuals profile with the following menu options:

Access Tab

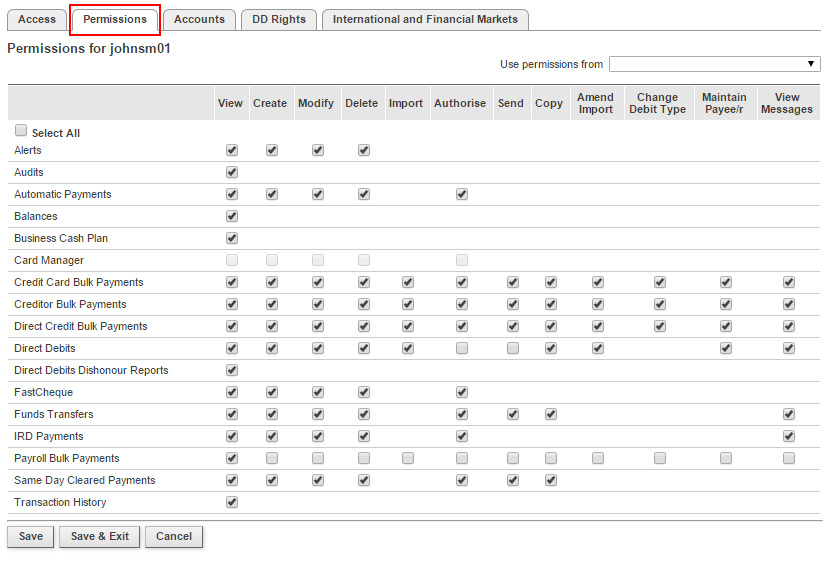
Permissions Tab
This is where you need to think about segregation of duties and security in regards to which user(s) can perform which tasks.
We strongly recommend you give this some thought before ticking ‘select all’
For example, a user may have permissions to create and send payments but not to authorise.
If you wish to discuss the various options in further detail, please phone the FastNet Business Helpdesk on 0800 225 527 Monday to Friday 07:30am – 08:00pm.
To assign permission:
- Tick the boxes of relevant functions you wish for the user to access perform
- Click save

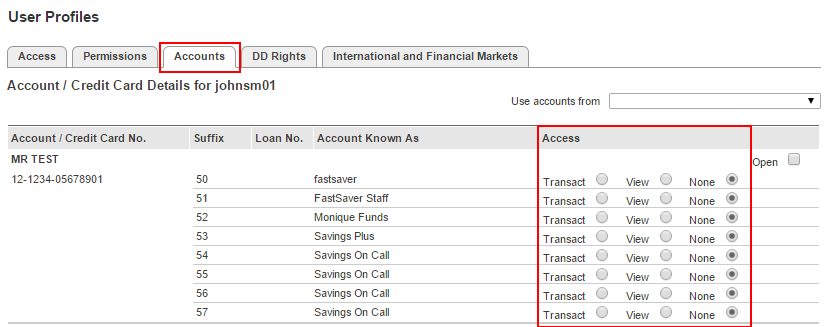
Accounts Tab
Under the accounts tab, you need to think about what kind of account access you want the user to have. You have the option to restrict access to view only or none (which will not display that account suffix for the user in question).

- Select the radio button to the required permission against the account(s) you wish the user to have access to and save.
- Click save
DD Rights & International
These are addition modules. Within these tabs, select what access you want the user to have
Once permissions have been selected – click save.
Authorising your User Changes
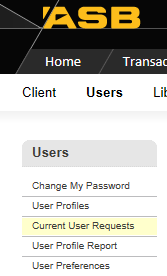
Once you have created / set your user permissions you will need to authorise them, you can do this by selecting Administration > Users > Current User Requests and entering your password and Netcode. Changes will take affect once fully authorised.

Related Answers
-
There are a few ways to check daily account and user limits, depending on what information you are looking for. ...
-
To change / remove permissions or account access for a user or administrator, go back into the users profile and ...
-
A new suffix should automatically appear on your FastNet Business site, however it is not automatically assigned to any users. ...
-
To delete an administrator Profile Deleting administrators can only be performed by the FastNet Business Helpdesk. To request a deletion ...
-
All netcode tokens must be ordered via the FastNet Business Helpdesk. You have a couple of options when requesting a ...
-
When a user profile has been deleted, it will be removed from the User Profiles – Users list. As a ...
-
When a user profile has been deleted, it will be removed from the User Profiles – Users list. As a ...
-
FastNet Business Limits The following limits apply to all FastNet Business sites Account Limit (for all FastNet Customers) International Limit ...
-
There are two types of users on FastNet Business: Administrator User If you wish to change an administrator to a ...
-
Note the following requests can only be actioned by a FastNet Business Administrator To unlock (reactivate) an inactive user Click ...
-
This change can only be made by one of your FastNet Business site administrators. (Note: An administrator cannot increase a ...